Learn How to Measure for Different Types of Home Flooring Including: Carpet, Vinyl, Tile, Hardwood and Laminate
We’re back with another question for the Home Flooring Pros. This week we’re looking at floor measurements and the best way to measure for flooring, which is such an essential part of planning your flooring project and most importantly your budget.
We’ll take a look at general floor measuring techniques and then get specific, because different flooring materials require different measuring methods. How you measure for laminate or hardwood is different from how to measure floor for tile.
Getting flooring measurements right assures you of having enough material from the same production run to complete the job, plus a little left over for potential future repairs.
There is a general technique to measuring flooring and a few keys to keep in mind for some types. Let’s go from the general to the specific.https://b525eabb093c046af3665a53078824bf.safeframe.googlesyndication.com/safeframe/1-0-37/html/container.html
Pro tip: It’s likely your flooring installer will want to measure your floors to verify that enough is ordered. Still, measuring the floors yourself will ensure that you’re not taken advantage of by a flooring sales person or an installer looking to pad their numbers.
How to Measure a Room for Flooring: The Basics
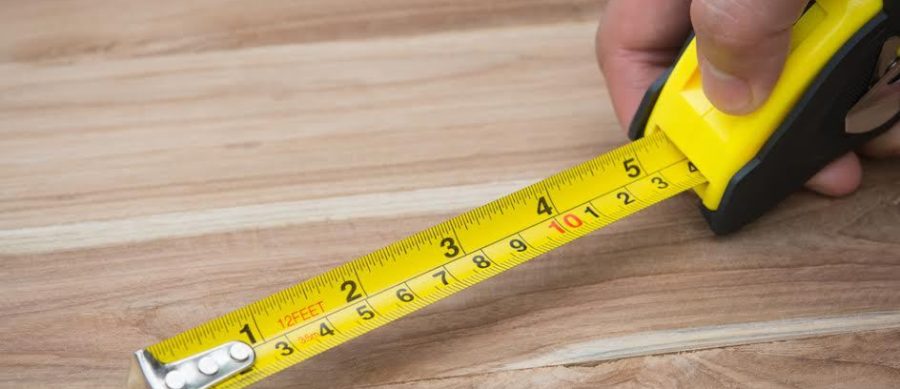
The essential approach is to measure each room separately and add their totals together. Then, add extra for trimming and to have spare flooring on hand for future use. For this job, a locking tape measure like this highly rated model from Stanley is ideal.
We suggest writing down room totals as you go. Drawing a rough sketch of the rooms where flooring will be installed, and writing the dimensions on the drawing, is another common approach.
- Measure the length and width of each room at its longest or widest point. Round up to the nearest half foot. For example, a room 12’ 4” wide would be considered 12” 6” wide. It will be an easier calculation if you convert that measurement to a decimal—12.5’.
- Multiply the length times the width to determine the number of square feet in each room. For example, for a room 20’ long and 15’ wide: 20 x 15 = 300 square feet.
- Add the sums together for each room to determine total square feet to be covered with the flooring.
Measuring L-shaped rooms: Measure each rectangle separately, and add the sums.
Tip: If the material is sold by the square yard, divide the total square feet by 9 to get total square yards.
How to Measure for Carpet
The basic approach applies. Measures rooms or room rectangles, and add the sums together. There are four additional factors for properly measuring for carpeting.
Fill: Consider a room 20×15 and carpet 12’ wide. The first run of carpet would cover 20×12 and leave a 20×3 area known as the “fill.” The fill area can be carpeted with smaller pieces seamed to the large piece, but the nap on both pieces must run the same way.
Here’s how to determine fill needed when using 12’ carpet:
- For a 2’ fill, divide the length of the room by 6, and add 6”.
- For a 3’ fill, divide the length of the room by 4, and add 6”.
- For a 3’ to 4’ fill, divide by 3, and add 6”.
- For a 4’ to 6’ fill, divide by 2, and add 6”.
- For a 6’ to 8’ fill, divide by 1.5, and add 6”.
The extra 6” allows for more precisely matched seams.
So, in our example, the room is 20’ long with a 3’ fill. Divide room length by 4: 20/4 = 5’ plus an extra 6”. Total carpet needed for a 20×15 room is a piece 25’ 6” long.
This approach ensures enough fill and that its nap is running the same way as the carpet it is seamed to. Adjoining pieces must have nap going the same direction for blending, so seams virtually disappear.
Additional factors:
Roll widths: Most carpet is sold in 12’ rolls; A much narrower selection, usually Berber, is available in 13.5’ or 15’ widths. If your preferred carpet is available in several widths, choose a width that will cover the room from wall to wall. This will eliminate seams.
Patterns: When patterned carpet must be seamed, it is essential to match the pattern side by side. Patterns repeat in carpet in as little as 8” and in as much as 72”. To ensure you order enough carpet to match seams, measure the length of the pattern, and add it to your length measurement.
How to measure carpet for stairs: Measure the tread (horizontal part) and riser (vertical part). Be sure to measure around the nosing – any short overhang of the tread. Multiply the measurement by the number of stairs in the case. Add 10% to account for carpet padding on each tread that will slightly raise its height. Using one continuous piece of carpet on the stairs is ideal, but using scraps and carpeting each step individually can make use of material left over from other area.
A flexible tape like this Stanley Reel tape is better for measuring stairs because you can easily wrap it around the nosing. With 100’ of tape, it is handy for landscape projects too.
How to Measure for Vinyl Sheet Flooring
The basics are the same as measuring for carpet including calculating for fill and patterns.
There’s one difference.
Roll width: Vinyl sheet flooring comes in 6’ widths ideal for small bathrooms, galley kitchens and similar narrow spaces. It’s available in 12’ widths for installation in larger rooms.
How to Measure Floors for Tile
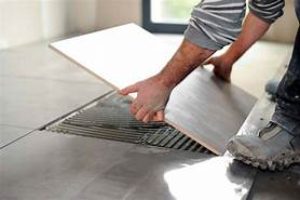
The basic length x width approach works with tile, but there are a few unique features to consider.
Add a half-foot to each room’s length and width: This ensures enough tile to account for cutting and waste.
Obstacles: Tile is often installed in rooms with a lot going on in them. Kitchens have islands and cabinets. Bathrooms have vanities and tub/shower enclosures.
- First determine how much tile you would need to cover the entire room without obstacles. In a 15 x 20 room, your equation would be 15.5 x 20.5 = 317.75.
- Then, measure the square feet of the obstacles, perhaps a 3 x 6 island (18 sq. ft.) and a run of cabinets that is 15 x 2 (30 sq. ft.).
In the example, total square feet of the obstacles is 48. Subtracted from 317.75 leaves 269.75 square feet of floor to be covered.
Square feet in a box: Most tile is sold in boxes that contain 10 square feet of tile. Partial boxes aren’t sold. Therefore, in our example, you’d need 27 boxes of tile for the job, and you’d have very little extra.
Pro tip: Consider the Plus One rule. When you’re left with less than half a box of tile, consider buying an extra box just to be sure you have enough to cover the floor plus a few spare tiles for repairs. Keep the extra tile in its original box, since the box has shade/caliber information that will be used to match it in the future, if you need additional tile. If it becomes clear you’ll “never” use some of the tiles for the floor, have fun with them with kids’ crafts like this one.
Big tiles, diagonal installation and waste: The larger the tile is, the more wasted material you should expect. For example, consider a project where the last row of tile against the wall only needs to be 3” wide. If you’re using 16” tile, you can take 3” off both sides, a total of 6” that leaves 10” of waste in every tile. Running the tile diagonally to the room’s layout also increases waste. It would be easy to say, “Add 10% to your total.” A more accurate way, and the one we recommend, is to have an experienced installer measure the floors and calculate how much tile you need given its size and how it will be installed.
How to Measure for Wood Plank Flooring
This is one of the easiest flooring types to measure for. Use the basic approach of length x width for each room or rectangular section of a room whether you’re using solid hardwood or engineered hardwood flooring.
Jeff Hosking of Hosking Hardwood Flooring recommends,
“adding 5% for cutting and fitting waste. This also covers boards you might not want to use due to heavy character or color variation.”
- Measure your rooms/rectangles
- Add the sums together
- Multiply the total by 1.05 to gain 5% for waste
Most hardwood flooring is sold in boxes containing 20 square feet of material. Divide your total square feet needed by 20 to determine how many boxes to buy.
If you’ll be left with less than half a box, consider the Plus One rule – buying an extra box to ensure you’ll have spare planks should future repairs be needed.
Pro tip: For better grades of flooring like Clear, Select and Better, the 5% waste rule is sufficient. If you’re installing a cheaper grade of wood flooring like #1 or #2 Common, Country, Cabin/Tavern or Shorts, don’t be surprised if the retailer or flooring contractor recommends up to 15% extra to cover flawed pieces and color variations too great to use. Click here for more about wood floor grades.
Diagonal installation: We recommend boosting your waste allowance to 15%.
How to Measure for Laminate Flooring
The techniques and tips for measuring laminate floors are the same as for hardwood, with one exception: Use the 5% waste factor whether you’re installing premium laminate or cheap stuff. It’s coloring should be consistent, and you shouldn’t find any defective pieces.


Leave a Reply
Your email is safe with us.